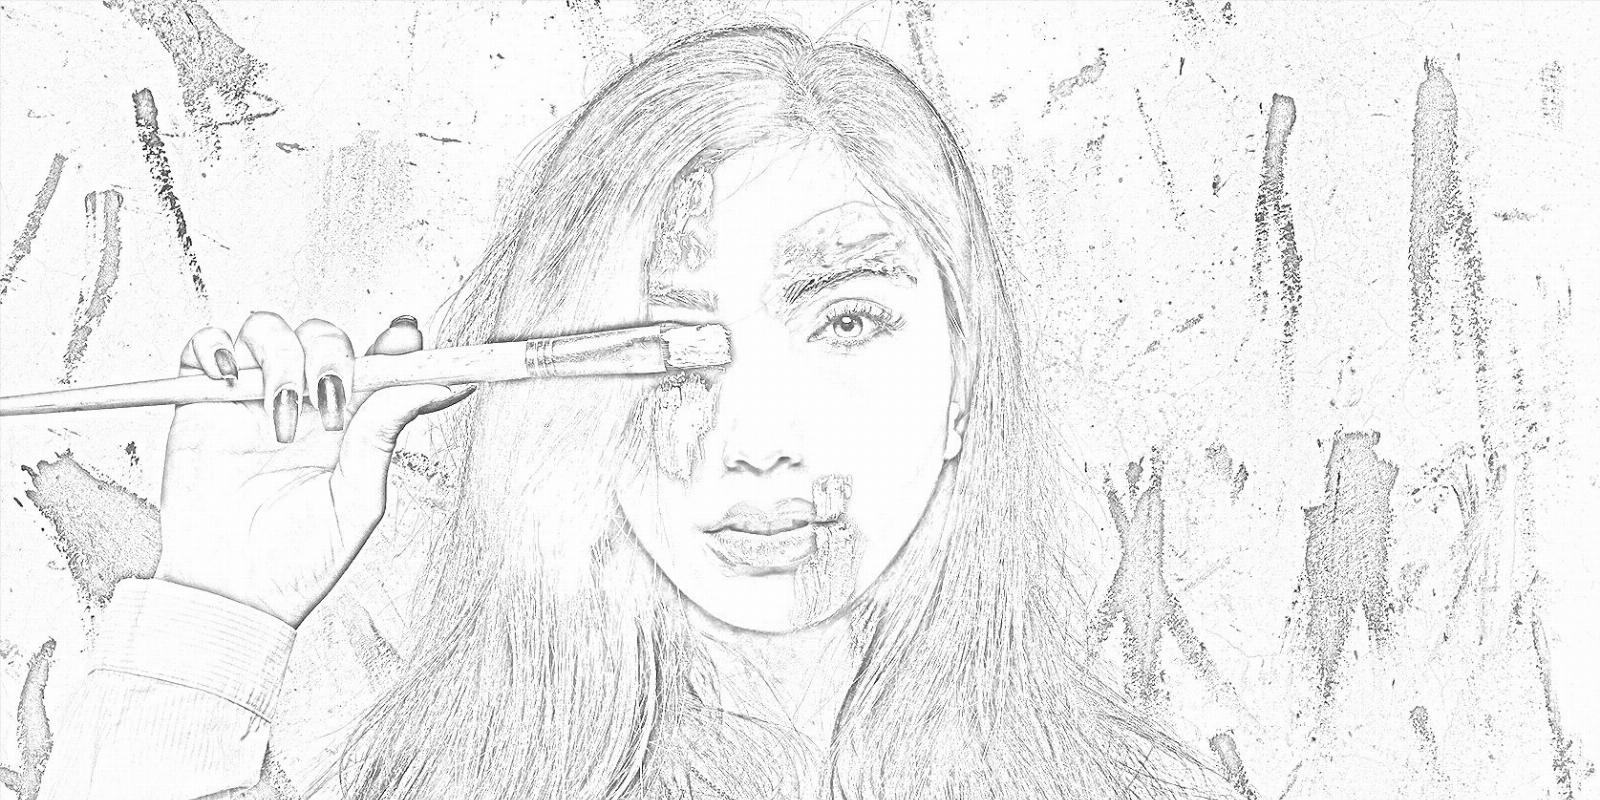
How to Turn Your Photos Into Pencil Drawings Using Photoshop
Reading Time: 2 minutesTurning your photos into pencil drawings doesn’t require any artistic skill. All you need is Photoshop.
Photoshop is a powerful creative tool when it comes to transforming your photos, and you can make all sorts of creative edits. In this tutorial, we’ll show you how to turn your photo into a pencil drawing. Let’s jump right in.
How to Turn Your Photo Into a Pencil Drawing
Most photos can easily be turned into pencil drawings in Photoshop. Just load your image into Photoshop and follow these easy steps.
- Right-click on the Background layer and select Convert to Smart Object.
- Go to Image > Adjustments > Shadows/Highlights.
- Check the Show More Options box if it’s unchecked.
- Adjust the sliders to create more contrast in the image. Every image will be different, and you may not need to adjust any of the sliders if your image is already edited. Once you’re happy, press OK.
- Go to Image > Adjustments > Black & White. We show you how to make expressive black and white photos in Photoshop too.
- Adjust the sliders to make an appealing black and white image (but don’t check the Tint box). Once again, these settings will be different for every image. Press OK once you’re happy.
- Duplicate the Background layer by dragging it down to the + icon (Create a New Layer).
- With the Layer 0 Copy active, go to Image > Adjustments > Invert.
- Change the Blending Mode of the Layer 0 Copy to Color Dodge.
- Go to Filter > Blur > Gaussian Blur.
- Adjust the Radius slider until your photo starts to look like a pencil drawing. The pixel radius will be different for every image, depending on the resolution. Then press OK.
- Click on the adjustments icon (half-filled circle) and select Levels.
- Clip the Levels to the Layer 0 Copy by pressing and holding the Alt key and hovering between the two layers. Then left-click. There should be an arrow indicating a clipping layer.
- Adjust the three sliders representing the Shadows, Midtones, and Highlights to your liking. Every image will be different.
Keep in mind that since we’re using Smart Objects, you can go back and adjust any of these settings to create a different effect.
If you want to take your pencil drawings to another level, we show you how to add textures to your text in Photoshop; you can use the same method for your drawing instead of text.
Turn Your Photos Into Pencil Drawings With Photoshop
Breathe new life into your photos and let your creative side shine by transforming them into pencil drawings. It’s easier than it looks and only takes a few minutes in Photoshop.
Reference: https://www.makeuseof.com/photoshop-how-to-turn-photo-into-pencil-drawing/
Ref: makeuseof
MediaDownloader.net -> Free Online Video Downloader, Download Any Video From YouTube, VK, Vimeo, Twitter, Twitch, Tumblr, Tiktok, Telegram, TED, Streamable, Soundcloud, Snapchat, Share, Rumble, Reddit, PuhuTV, Pinterest, Periscope, Ok.ru, MxTakatak, Mixcloud, Mashable, LinkedIn, Likee, Kwai, Izlesene, Instagram, Imgur, IMDB, Ifunny, Gaana, Flickr, Febspot, Facebook, ESPN, Douyin, Dailymotion, Buzzfeed, BluTV, Blogger, Bitchute, Bilibili, Bandcamp, Akıllı, 9GAG