How to Fix IRQ Problems With Your Soundcard on Windows
Reading Time: 6 minutesIRQ problems can plague older hardware. Fortunately, fixing it is pretty easy on Windows.
Sound cards, especially old Creative models, are notorious for how they don’t like ‘sharing’ the computer’s resources with other hardware, leading to what’s known as the dreaded ‘IRQ problems’. Theoretically, those issues should have been fixed with modern PCs and OSes, where IRQs are automatically handled without requiring the user’s intervention.
Practically, though, sometimes you end up stuck with a non-working sound card that ‘can’t find available resources’. Since users can’t control those resources anymore, there’s seemingly no solution on the horizon. Fortunately, there is.
What Does the Windows IRQ Issue Affect?
Note that here we’ll be tackling the issue of a sound card not working because the PC/OS can’t allocate the resources it needs. If your sound system works, but you’re dealing with other issues, like an audible buzz, check our guide on how to fix a buzzing sound on Windows.
Although this article is primarily about sound cards which are known to occasionally ‘disappear’ and show up as non-working hardware (especially older models by Creative), you might meet similar problems with other legacy gear.
What Does ‘IRQ’ Mean?
If you’re still using any older expansion card, from network modules (Ethernet, WiFi, or Bluetooth) to SATA controllers, and especially on older PCs, you might find yourself too in what back when Windows 98 was the latest OS dubbed ‘IRQ hell’. It’s all because of Interrupt Request Lines, or IRQs for short, which you can think of as ‘pathways’ through which extra hardware can ‘communicate’ with the CPU.
As PCs kept evolving, they gained extra functionality through new hardware. This hardware had to communicate with the CPU; in some cases, there weren’t enough IRQs available for everything. Thankfully, since a printer and a joystick didn’t have to communicate continuously with the CPU, some bright individuals came up with the idea of IRQ sharing.
What Is ‘IRQ Sharing’?
IRQ sharing is precisely what it states: the ability for two or more pieces of hardware to share the same ‘line of communication’ with the CPU, in practice, ‘taking turns to chat with it’. However, when a piece of hardware ‘needs more time to chat with the CPU’, and especially when it’s almost continuously active, it might ‘not like sharing its time with others’, to put it lightly.
Thankfully, modern hardware is designed to avoid such problems. New PCs use a new standard known as Message Signal Interrupts, which enables more versatile communication between all the extra hardware on a PC and its CPU.
And yet, many are still using older hardware that’s perfectly capable of running a modern OS like Windows 10 and 11; why upgrade if it still works? Hardware that still works fine and can even play a modern game or two, even if it can’t present Cyberpunk 2077 in all its ray-traced glory.
It’s worth noting that you can still purchase older and more affordable sound cards that connect to the motherboard through a PCI port (if it has one) instead of the newer PCI Express standard.
Plus, as is the new fad, you might be setting up a retro PC for playing your favorite old games without having to fiddle with emulators.
On such hardware, you might occasionally see a perfectly working device appear disabled in the Device Manager, with an error stating that it can’t find any resources.
The suggested solution is to disable another piece of hardware to free resources. But why should you now have to choose what to use if everything used to work without issues before your last reboot?
1. Remove Your Soundcard
In the past, you could control IRQs through the PC’s BIOS. Since only ‘advanced users’ dared enter that obscure menu with cryptic options and enigmatic values ‘to tweak their hardware’, eventually, those options were removed. Today’s PCs handle all IRQ assignments automatically, with their UEFI and OS controlling which IRQ goes where.
Thus, theoretically, you can’t control IRQs yourself, and the official suggestion ‘to remove a piece of hardware’ seems like the only viable option. Practically, it is, but ‘this piece of hardware’ can be the sound card itself, and its removal can be temporary.
That’s because by removing and reconnecting your sound card, your PC’s BIOS/UEFI and Windows OS will try to re-assign an IRQ for it. In doing that, they might choose a different IRQ than the one it was using, solving your IRQ-sharing-related problem.
So, the first step is, removing a piece of hardware: the soundcard itself.
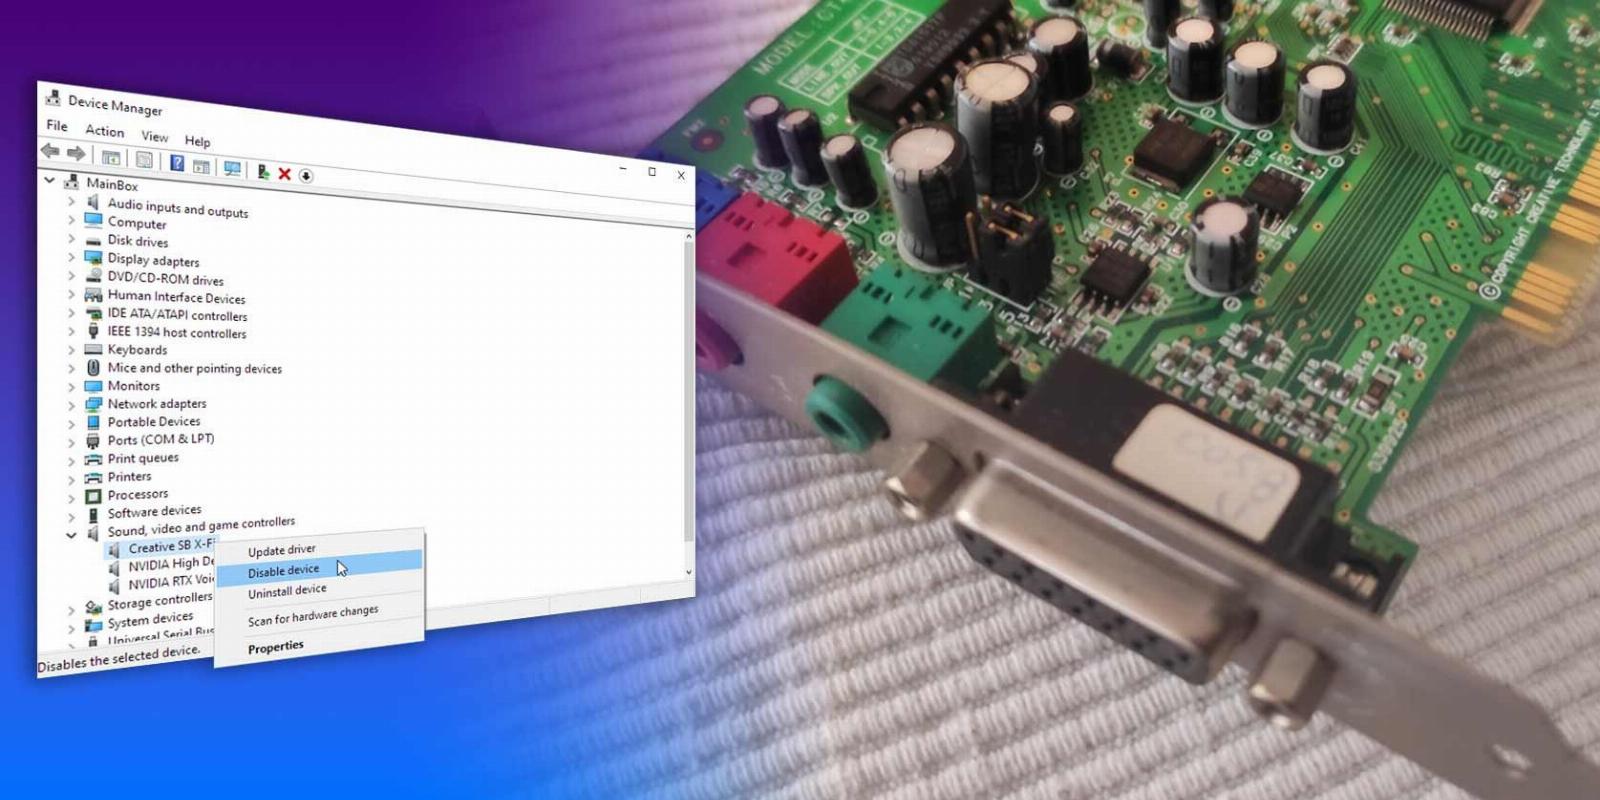
Start with the steps we saw in our guide on how to enable or disable sound output devices in Windows. We suggest you follow the steps in the third section, Enable or Disable a Sound Output Device via Device Manager.
Then, it’s time for the more challenging part: physically removing the actual sound card.
- Shut down your PC.
- Turn off its power supply.
- Hold down your PC’s power button for 5 seconds to ‘drain’ any remaining electricity from its components.
- Unscrew the screw that keeps your sound card in place.
- Unplug your sound card.
With your sound card still unplugged, turn on your PC’s power supply. Then, power on your PC. Enter Windows as usual. We must stress that you should not try to connect your sound card back to your PC while it’s turned on. Keep its case open since soon you’ll have to reconnect the sound card, but do not touch anything inside it while it’s powered on to avoid damaging it or harming yourself.
When you’re back at your desktop:
- Visit the Start menu and start typing ‘Add Remove’ to find the Add/Remove Software panel, then run it.
- Search for any entry related to your sound card, and uninstall it.
Reboot your PC; you should see no hint of your former audio device. Check the Device Manager and Add/Remove Software panel again to ensure it’s gone while everything else works correctly.
With that out of the way, it’s time to bring your sound back.
2. Reconnect Your Soundcard
Follow the same steps as before to shut down your PC, fully power it off, and ensure all components are discharged. Then, re-plug your sound card.
We suggest you avoid screwing it down until you ensure it works, for you might have to repeat this process until the BIOS/UEFI & OS combination decide to assign to it a different IRQ.
It also helps to plug it into a different expansion slot if your motherboard has more than one available.
3. Performing Device Re-Detection and Driver Installation
Power on your PC again, and when you enter your Windows desktop, it should automatically re-detect your sound card. Modern versions of Windows (from 7 and on) should find your sound card with no issues and install the correct drivers for it or (depending on brand and model) a ‘generic’ working alternative.
Press Win + X and revisit the Device Manager. Your sound card should be active and working, with no mention of any problem finding resources.
If not, repeat the last steps:
- Remove any software/drivers that were automatically reinstalled for it.
- Shut down and power off your PC.
- Unplug your sound card.
- Power on your PC, and check there’s no hint of your sound card.
- Shut down and power it off again.
- Reconnect your sound card (if your motherboard comes with more than one, try plugging your sound card into another expansion slot).
Rinse and repeat until the problem’s solved. When your sound card works with no issues, it’s best to visit its manufacturer’s site and download and install its latest available drivers (and any extra software you use with it, like additional ‘control panels’).
Note that the solution we saw is strictly for when you see a message that there aren’t enough resources for a piece of hardware. However, they’re not the only IRQ-related issue you may face.
A faulty driver can make your PC crash with an IRQ_NOT_LESS_OR_EQUAL problem. Thankfully, we’ve covered how to solve such problems in our guide on easy ways to fix the IRQ_NOT_LESS_OR_EQUAL error in Windows 10.
Getting Your IRQ Issues Fixed on Windows
Although we poke fun at the classic advice ‘have you tried turning it off and on again, ‘ this can solve many tech-related headaches.
The more knowledgeable among us would point out that by ‘power cycling’ your gear, you could solve problems with memory leaks and corrupted caches. They’d offer a rational explanation on why something that sounds ridiculous is sound advice that, strangely, works.
The case we covered in this article is similar, even if it sounds even more ridiculous. Who would expect that the solution to finding the necessary resources that suddenly disappeared, rendering an old piece of hardware useless, could be summed up with ‘have you tried unplugging and re-plugging it in’?
Reference: https://www.makeuseof.com/irq-problems-soundcard-windows/
Ref: makeuseof
MediaDownloader.net -> Free Online Video Downloader, Download Any Video From YouTube, VK, Vimeo, Twitter, Twitch, Tumblr, Tiktok, Telegram, TED, Streamable, Soundcloud, Snapchat, Share, Rumble, Reddit, PuhuTV, Pinterest, Periscope, Ok.ru, MxTakatak, Mixcloud, Mashable, LinkedIn, Likee, Kwai, Izlesene, Instagram, Imgur, IMDB, Ifunny, Gaana, Flickr, Febspot, Facebook, ESPN, Douyin, Dailymotion, Buzzfeed, BluTV, Blogger, Bitchute, Bilibili, Bandcamp, Akıllı, 9GAG