How to Create a Dual Lighting Effect in Photoshop
Reading Time: 2 minutesThe dual lighting effect adds a pop of color to your pictures, and it’s very easy to do in Photoshop.
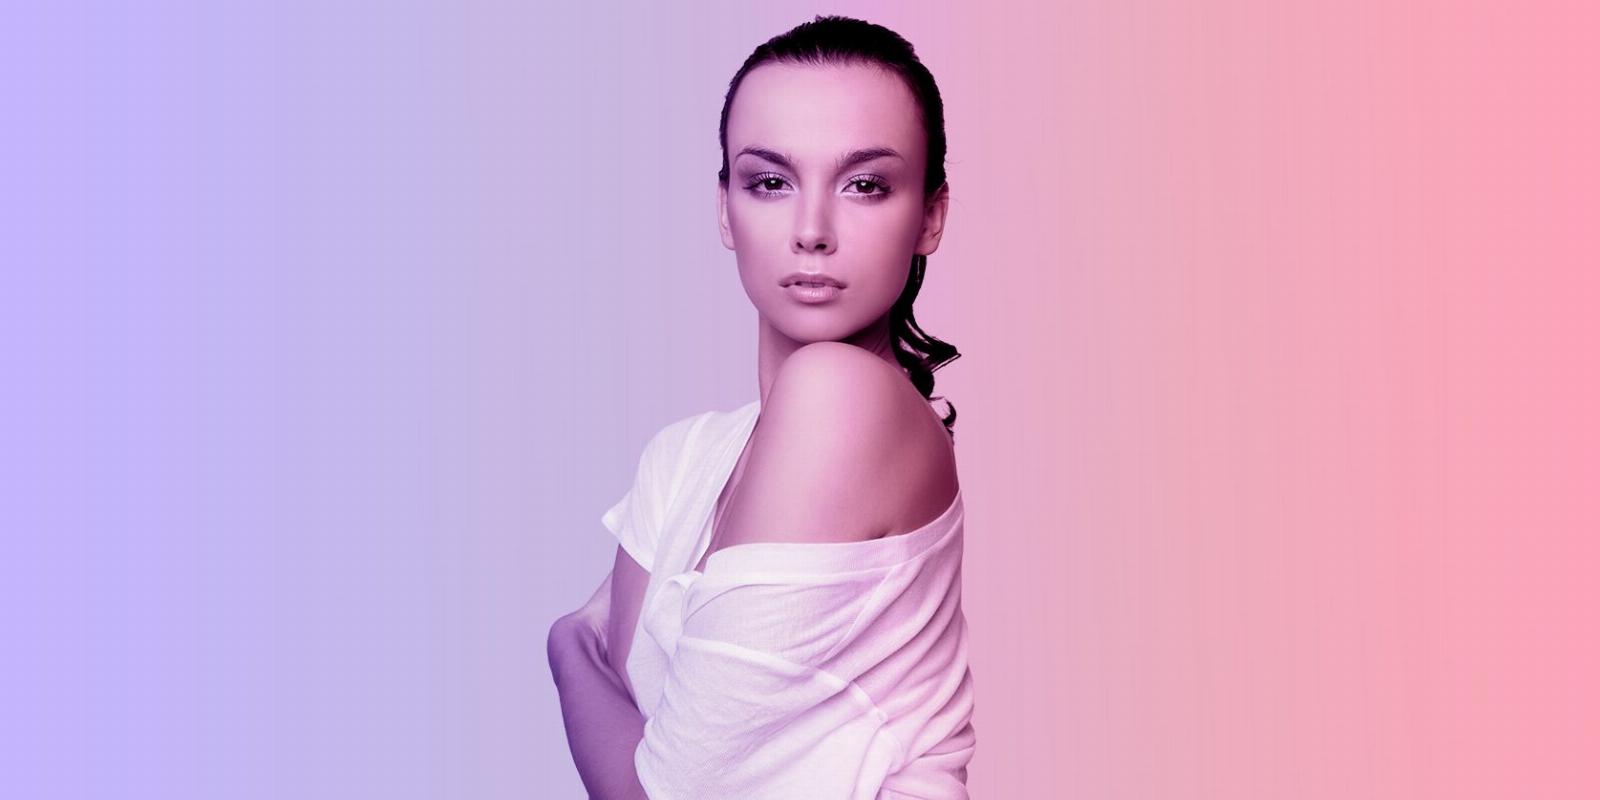
The dual lighting photo effect is popular among professional photo editors and hobbyists alike because it’s so easy to do, and the results are quite stunning. In this tutorial, we’ll show you how to quickly create the dual lighting effect in Photoshop using two separate color gradients. Let’s get started!
What Is a Color Gradient?
A color gradient is a wash of color that spreads from a point of pure color and fades out to transparency. You can use a color gradient in Photoshop to make it look like a colored gel was used on a studio light to cast the color onto your subject’s face. For detailed examples of color gradients, see our guide on how to create a custom gradient in Photoshop.
How to Create the Dual Lighting Effect in Photoshop
Creating the dual lighting effect is easy. We’ll show you two different versions of this; a subtle effect and a stronger effect. Just follow the steps below.
- With your image loaded into Photoshop, click on the Foreground color and change it to the first color you want. We chose red. Then click OK.
- Create a Gradient from the Adjustments menu.
- Change the Angle to -180 to place the red gradient on the right of the subject.
- Left-click on the image to drag the gradient to exactly where you want it. Then click OK.
- Now choose the color for the second gradient just like in Step 1. We chose blue. Then click OK.
- Repeat Steps 2 – 4. But in Step 3, change the Angle to 180 and check the Reverse box. This will place the second gradient on the left side of the subject.
- With the top layer active, click and press Ctrl on the middle layer so that both gradient layers are highlighted.
- Press Ctrl + G to create a Group folder.
- Change the Blending Mode from Pass Through to Color.
That’s all there is to it. That was the subtle version of the dual lighting effect. To make it even subtler, you can reduce the Opacity of the Group to 50%.
For a stronger effect, change the Blending Mode back to Pass Through and settle for an Opacity that looks best to you. We went with 70%.
You can also create stunning lighting effects using the Overlay Blend Mode in Photoshop.
Add a Pop of Color to Your Images With Dual Lighting
We’ve shown you two ways to apply the dual lighting effect to your pictures in Photoshop. It’s a quick and easy method to add a colorful and creative touch to your images. Try it out to see which color gradients you like best.
Reference: https://www.makeuseof.com/photoshop-how-to-create-dual-lighting-effect/
Ref: makeuseof
MediaDownloader.net -> Free Online Video Downloader, Download Any Video From YouTube, VK, Vimeo, Twitter, Twitch, Tumblr, Tiktok, Telegram, TED, Streamable, Soundcloud, Snapchat, Share, Rumble, Reddit, PuhuTV, Pinterest, Periscope, Ok.ru, MxTakatak, Mixcloud, Mashable, LinkedIn, Likee, Kwai, Izlesene, Instagram, Imgur, IMDB, Ifunny, Gaana, Flickr, Febspot, Facebook, ESPN, Douyin, Dailymotion, Buzzfeed, BluTV, Blogger, Bitchute, Bilibili, Bandcamp, Akıllı, 9GAG